Relief Sculpt
Sculpt is the process of working a material such as stone or wood to change its shape with brush tool . Sculpting a relief in Ucancam is very similar to working with a ball of clay in the real world – you can mould it into different shapes, add or take away material and give the relief fine detail.
Command:
Menu 【Relief > Sculpt】
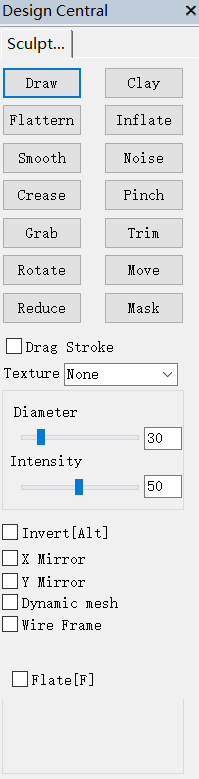
Common Settings:
□ Drag Stroke:
there are 2 stroke mode in ucancam : Dots stroke and Drag strok.
The Stroke determine how each brush tool is applied when the cursor is dragged on the model. By default, most brush tools are applied with the Dots
Dots Stroke: Dots means that several instances of the brush will happen at regular intervals when you sculpt.
Drag Stroke: they’re applied once at the first click, and resized when the cursor is dragged.if hold down [Shift], the diameter of brush is fixed, the intensity of brush wiill be changed with the mouse movement.
Texture(alpha):
It’s a grayscale image, where black pixels mean no deformation and white pixels full deformation.the texture will modualte your brush behavior.
Diameter:
This slider controls the diameter of the brush tool, measured in pixels.
Hold [ Shift ] ,and scroll the mouse to change the brush size interactively.
Intensity:
Controls how much each application of the brush affects the model. For example, higher values cause the Clay brush to add depth to the model more quickly, and cause the Smooth brush to smooth the model more quickly.
The key ” ;” and ” ‘ ” allows you to change the brush strength interactively.
Hold [ Ctrl ] ,and scroll the mouse to change the brush strength interactively.
Brush strength can be affected by enabling the pressure sensitivity, if a supported tablet is being used.
□ Invert:
This option controls whether each application of the brush affects the normal or -nornal direction of relief.
Hold [ Alt ] ,you can change the [invert] interactively.
□ X Mirror:
□ Y Mirror:
This turns mirroring on and off. When Symmetry is turned on, anything sculpted on one side of the mirror plane will then be applied to the other side. .
The center of mirror is positioned at the center of mesh.
□ Dynamic Mesh:
As you sculpt, ucancam is adding more triangles to the mesh so that it can support the finer details that you’re creating.
□ Wire Frame:
Clicking this will toggle display of your model’s wireframe, which appears as an overlay on top of the mesh. This allows you to see the actual triangles and get an idea of how efficient the geometry use is. Seeing the wireframe can also help you identify problem areas that you might need to fix by smoothing or reducing.
Brush Tool:
There are many different brushes you can sculpt with in ucancam. Each brush has a unique property that allows it to do something the other brushes cannot.
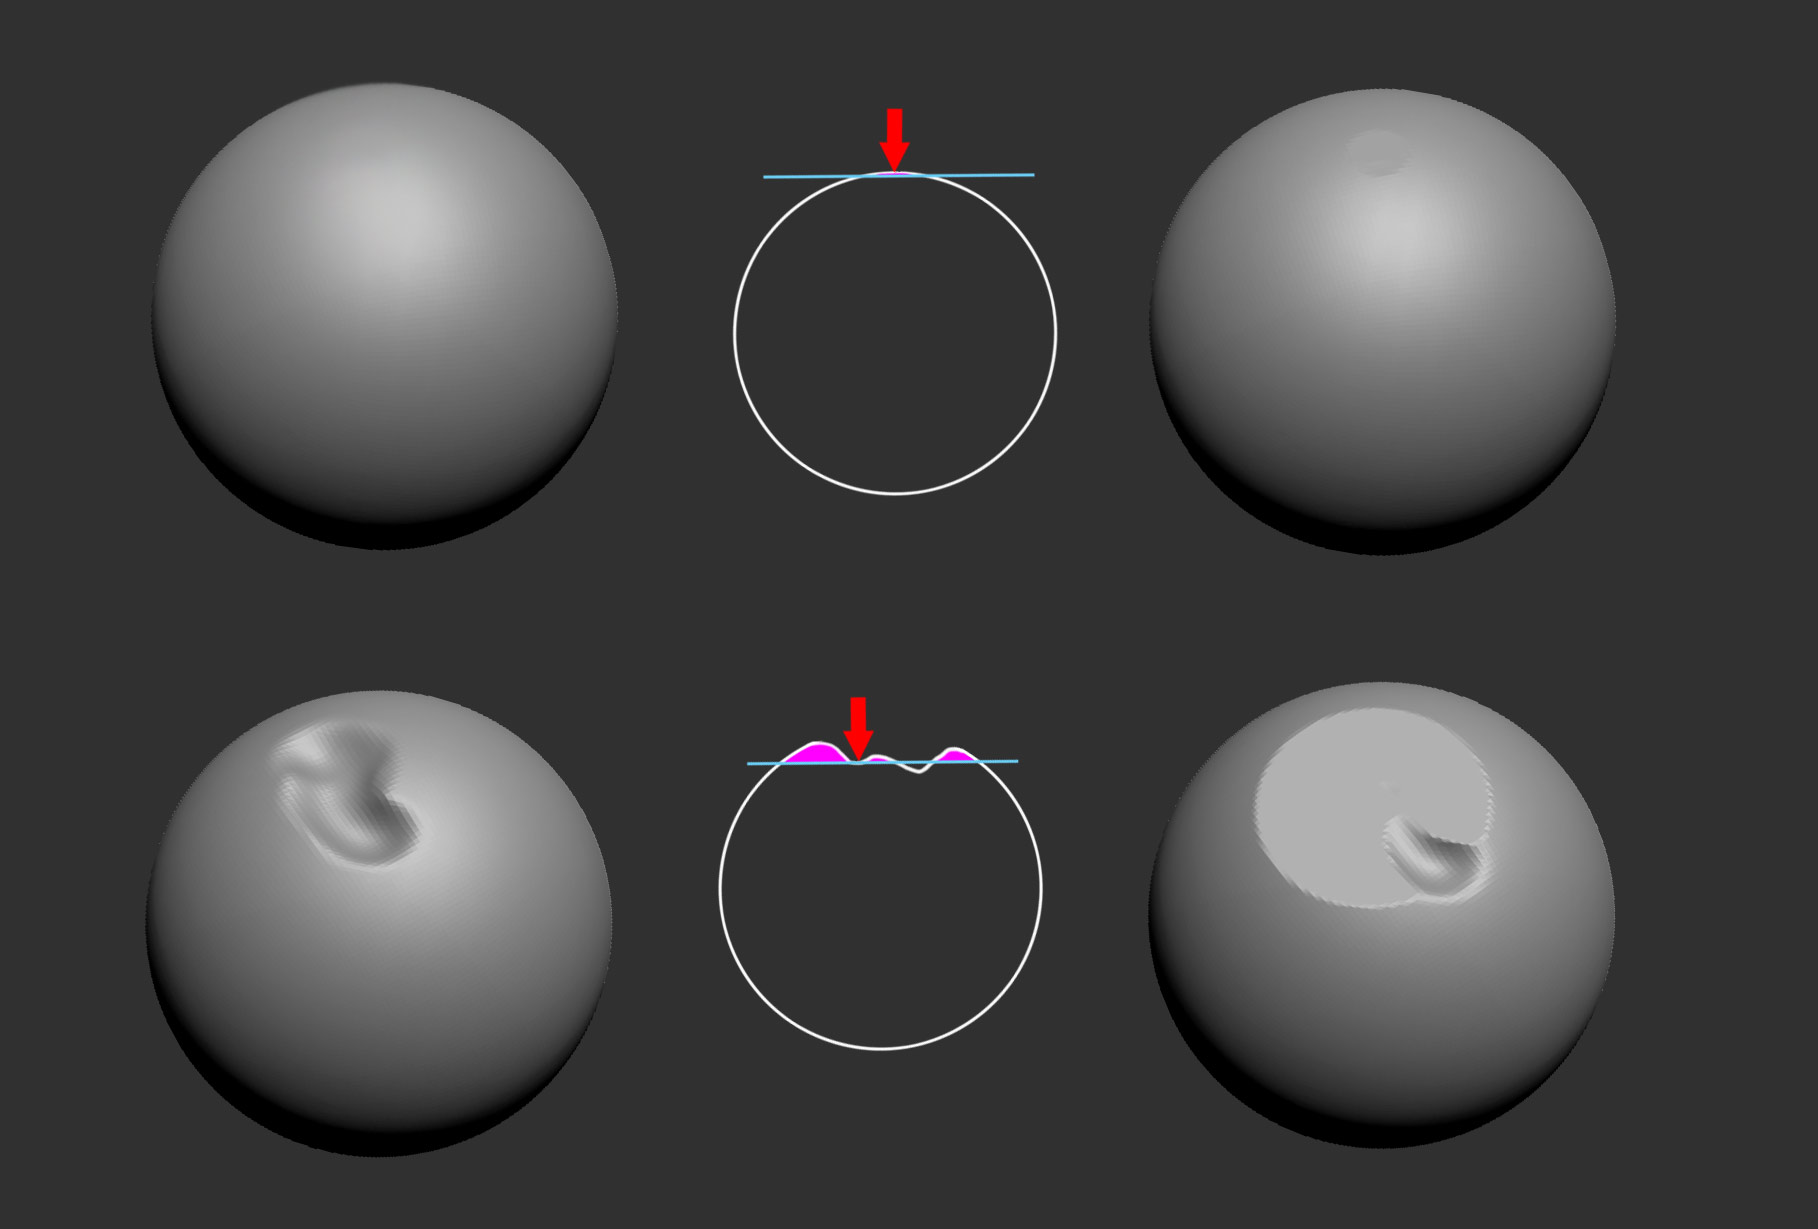
Draw:
This is the default drawing tool. It lifts the digital clay up from the surface of the model (or pushes it in if Invert is active). If a stroke crosses the same area multiple times, each time will build the surface up higher.
The draw brush smoothly sculpts the mesh. Its strength is given by the Intensity parameter. Activating the Invert checkbox inverts the sculpting direction, so that the brush creates a hollow at the cursor position. Activating the Flat checkbox results in a more leveled deformation. and prevent deformations to add up when dragging over the same spot multiple times in a single stroke.
Pressing the Alt key causes the draw brush to carve into, rather than build up the model.
Clay:
Similar to the Draw brush, It behaves like a combination of the Flatten and Draw brushes.
Flatten:
The Flatten brush generates a flat area by leveling all detailed structures. Its strength is given by the Intensity parameter. By activating the Lock plane options, all vertices are being projected onto the same plane which is determined by the initial mouse click.
Inflate:
Makes the mesh within the brush area swell outward like blowing up a balloon. This is very useful for enlarging or exaggerating any details that are already sculpted on the surface.
Smooth:
The Smooth brush smoothes detailed structures by averaging over all vertices that are affected by the brush. Its strength is given by the Intensity parameter.
Noise:
The Noise brush adds a noises on relief node. Intensity and Invert parameters have identical meanings as for the Carve tool.
Crease:
Chisels a line into the surface. Inverse mode makes a sharp ridge instead.
This tool is useful for actual creases, as well as for defining shapes of various kinds. It can give more control than the Draw tool provides when creating sharp edges.
Pinch:
The Pinch brush moves all affected vertices towards the center of the cursor. This is useful for creating hard edges. By activating the Invert parameter, the vertices are moved away from the center of the cursor.
Grab:
The Grab tool allows to grab and move vertices of the mesh. This is useful for moving large parts of a mesh (large radius) or creating short spikes (small radius). The brush allows you to move vertices around while (to the extent permitted by the density of your model) those vertices remain on the existing surface. Contrast this to the Move brush, which moves vertices in the screen’s xy plane, without paying any attention to the underlying surface.
Trim:
Trim the mesh on view plan with a drag line. and fill the hole.
Rotate:
Twists the mesh . Click and drag to pull the handle out towards and then drag around in any direction to control the angle.
Rotation takes place around the clicked point, relative to your viewing angle rather than the model’s surface. Put another way, imagine that it’s a disk spinning on the surface of your monitor and affecting anything behind it.
Move:
Simply moves the affected region sideways along the view plane
Reduce:
The other sculpting tools add triangles to the surface, giving you a finer mesh to work with. This tool has the opposite effect. Paint with this brush to remove triangles and reduce the amount of detail.
Since this tool works directly on the model’s underlying geometry, selecting the Reduce tool will automatically enable the wireframe display so that you can see the brush’s effects.
This tool uses the starting point to determine its strength. Whatever the mesh density is where you begin your stroke, that’s what the brush will try to maintain as you move across the surface. If you want a greater effect, make a stroke from a coarse region into a finer one.
Inverse mode adds triangle density to the surface rather than removing it. This is exactly the same as if you were making a stroke with the Draw tool, but it won’t modify shapes. In other words, it can be used to refine an area without modifying sculpted details.
Mask:
This brush allows you to paint protected areas on your model that will then be immune from editing. This allows you to focus on sections of the sculpt without worrying about accidentally changing things you want to keep.
To mask an area, simply select this brush and paint on the model. Inverse will allow you to modify areas that have already been masked, painting where you want to remove the mask.
Holding the CTRL key automatically enables masking without the need to physically click the brush icon.
Mask is valued from 0 — 1.0 ; 0 means no mask.
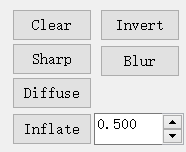
Clear:
Clear off all the mask. or hold [Ctrl], and the mouse double click the blank of mesh;
Invert:
Invert the mask region. or hold [Ctrl], and the mouse single click the blank of mesmeh;
Sharp:
Make the mask value near to 1.0.
Blur:
Make the mask value in neigbor smoother.
Diffuse:
diffuse the mask area to neighbor in smoothly .
Inflate:
inflate the mask region .