Tip: Start typing in the input box for immediate search results.
Sweep Relief
the cross section curves sweep along a drive rail curve to create relief.
Command:
Menu【Relief > Sweep Relief】
Parameter in dialog:
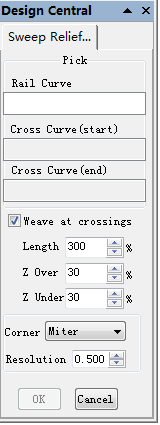
Pick:
Rail Curve:
when [Rail Curve] editor is enabled, use the mouse to select one open or closed vector you wish to use as the drive rail for you to sweep or weave along. your rail vector will be highlighted and now show a green dot (start node) indicating the start of the vector from which the sweeped shape will begin, and arrow markers along its length to show the direction of the sweep.
The default start point and direction shown may not be what you intended. , To change the direction, pick vector again.you will now see the arrows on the drive rail change direction.
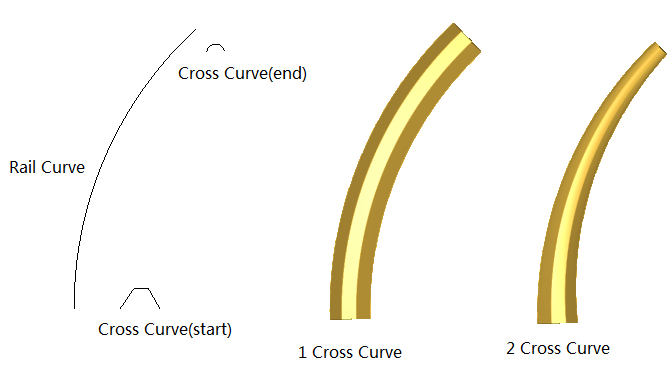
Cross Curve(start):
The next step is to select one cross-section vector to sweep along your rail to form a 3D shape. In order for vector to be used as valid cross-section shape, they must be open.
Cross Curve(end):
It is possible to sweep between 2 cross section vectors along a drive rail blending from one vector shape to another.
select an open vector as the end section of 3d shape.
Note: if using just a single cross section then you just need to make sure it is selected and then can proceed with the other settings in the dialog calculate your shape.
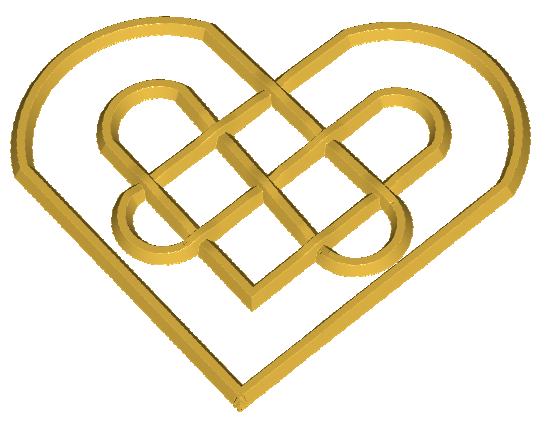
Weave at crossinngs:
Length: It is is a percentage of the cross-section’s length.
Enter the length of the crossover. The crossover is the section of the drive rail that underlies or overlaps at intersections.
Z Over: It is a percentage of the cross-section’s height.
For example, Entering a Z Over percentage of 50% would force the locations of the shape which are being raised as they weave to be 1½ times their original height.
Z Under: it is a percentage of the cross-section’s height.
For example entering a Z Under percentage of 50% will force the locations which are being weaved under to be half their original height.
Corner: Round or Miter

Round:

Miter:

Resolution:
The resolution of the relief defines the size of the grid units that make up the relief. A relief is a gridded surface and when a relief is created, it is necessary to define how large each grid unit should be.
If a resolution of 0.5 is set, then each grid unit will be 0.5 wide and tall. Therefore, the level of detail for the information on that relief will be limited 0.5.
The thing to remember is that reliefs in your drawing require memory that is directly related to the size of the relief and its resolution. As you increase the size of a relief, it requires more memory. If two reliefs are the same size and one relief is 0.5 and the other 0.25 , the second relief will require four times the amount of memory as the first. You can see that this is an important consideration when defining a relief. In general, you should define as low a resolution for a relief as will accommodate the level of detail for that relief.